
This first couple of months here have been busy. Building furniture, meeting new people, getting involved in the local radio scene. Trying to build the station up for HF operations.
Ham radio can be a lot of fun even as a solo practitioner, by that I mean working on your own projects. But the fun really kicks in when you are part of the larger community. There are opportunities to engage with fellow hobbyists and the community at large.
KBARA
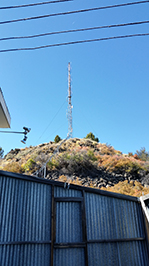
 The local radio club is the Klamath Basin Amateur Radio Association. I started off with the group as a VE for one of the clubs exam sessions and then a couple of events with the group, the Crater Lake Rim Run, and a Safety Fair. We also had a work party up at two of the clubs repeater sites, Hogsback Mountain and Plum Ridge. The folks are very nice and I have been making a lot of solid radio contacts. Several of the members have been very encouraging in my EmComm endeavors.
The folks are very nice and I have been having a lot of fun. Several of the members have been very encouraging with my EmComm endeavors.
The Community
CERT
 I have been in communication with the Klamath County CERT group for a while and have been to one of the meetings, with another one tomorrow night.
Some of the KBARA folks are members of CERT as well so I’m not walking in blind or friendless.
I have turned in my County Volunteer paperwork and I’m just waiting to hear back. So, I’m not a member of the team yet, but things were looking good after the last meeting. We shall see.
NTS
 I have wanted to get involved with NTS for a long time. In August I got in touch with the Section Traffic Manager to find out what I needed to do to get a local net going. After a few exchanged emails I started checking in regularly with two of the big Section nets that cover the whole state and several surrounding states, Beaver State Net, and Oregon Emergency Net.
After checking in to BSN and OEN for a couple of weeks I set up a local net, the Klamath Basin Traffic Net. Things are still very new and there hasn’t been much of a response yet, but that’s fine. It’s giving me time to work into it all.
I have had several opportunities to handle traffic from the net and I will start originating traffic once I work out a couple of issues in the station.
Skywarn™
I was hoping to get involved with Skywarn™ but the National Weather Service rep from Medford indicated that the local weather isn’t that big a deal and the amateur radio presence in this area isn’t active or needed. Without any support or interest from the served agency, there really aren’t many opportunities to serve. So, I guess I’ll just leave it at that for now.
The Station
There has been a lot going on with the station as well. After a couple of weeks of working the BSN and OEN with my low power, 5 watts, Yaesu FT-817 on the MFJ-1982LP end-fed antenna it was clear that I needed a bit more power to participate in nets, especially when the propagation conditions are bad.
I also needed to do something about the low power Baofeng UV-5R+ handheld transceiver I was using as a base station if I was going to be running a local net.
QYT KT-8900D
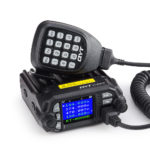 The mobile radio I have been using in the truck works very well, so it made sense to use the same radio for the base. This bumped me from a 5 watt HT up to 25 watts. The local net is running on a club repeater, and we do have a backup repeater as well and both have emergency power so 25 watts is fine for making contact throughout much of the southern part of the county.
The club has plans to link with other repeaters so we will have coverage throughout the county and beyond.
Diamond X50A
 The homebrew J-Pole I was using would be okay, but it was limited to the 2 meter band and some of the repeaters in the area are in the 70 centemeter band. I needed something with a wider bandwidth and dual-band. Enter the X50A.
It was a simple task to swap out the twin-lead J-Pole antenna, which is now ready for my go kit, and put the X50 in its place. The X50 is also a commonly used antenna for amateur repeaters so it is reliable and can handle more power than I am putting through it.
ICOM IC-718
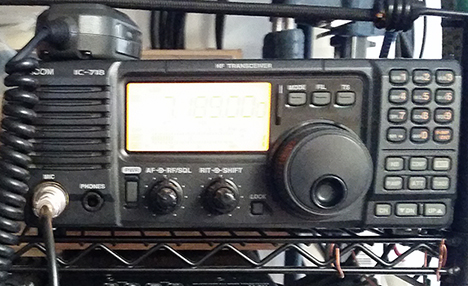 I mentioned the need for more power on HF. The solution that presented itself was an ICOM IC-718 that one of the club members wasn’t using and was willing to sell. The radio is rated to 100 watts which
The radio is rated to 100 watts, which has been helpful, though the last month band conditions have been crap making 5 watts nearly impossible and even at 100 it’s been difficult.
Initially, I only had the MFJ-1982LP antenna for HF that would cover 80 meters. The LP stands for Low Power, it can only handle 30 watts so when I first started using it I had to keep the power down low making it only a little better than the Yaesu FT-817.
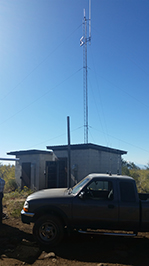
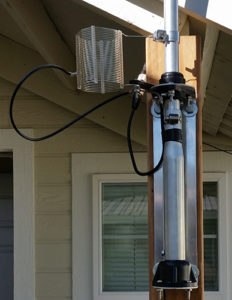
Hy-Gain AV-18VS
 The AV18VS is a nifty multi-band antenna that covers 10-80 meters. It uses a manually adjusted inductor to tune the various bands. Since the coil is at the base of the antenna, it’s not practical to get it way up in the air. In fact, it is intended to be used 3-5 feet above the ground. I have mine set at a little over 5 feet but it has a really good ground right under it.
It uses a manually adjusted inductor to tune the various bands. Since the coil is at the base of the antenna, it’s not practical to get it way up in the air. In fact, it is intended to be used 3-5 feet above the ground. I have mine set at a little over 5 feet but it has a really good ground right under it. In fact, it is intended to be used 3-5 feet above the ground. I have mine set at a little over 5 feet but it has a really good ground right under it.
It will likely be less convenient when the weather turns and we start to get snow. I plan on building some kind of hat to keep the snow off. I am still thinking that through.
Mobile
I have been running mobiles since July. I installed a QYT KT-8900D, a Midland MXT400 GMRS, and Uniden BEARCAT 980SSB CB when we first moved. Noone up here uses CB, but there is a lot of ham and GMRS traffic so I ended up pulling the CB.
I had always intended to install permanent mount antennas but it wasn’t practical at the time, which worked out well since I am driving a different vehicle than I started out with.
After getting the new (to me) truck in July I mounted a shelf that replaces the visors, the Vertically Driven Products Shelf-It. This works out great for holding radios and other stuff. We used to install these in all of the tow trucks when I drove tow.
I don’t use the visors, and with them mounted on the Shelf-It it’s hard to see traffic lights, so I just left the visors off.
Yesterday I finally got around to installing the NMO mounts in the roof of the truck. I installed three, one for the QYT KT-8900D, one for the Midland MXT400 GMRS, and a third possibility for the Yaesu FT-817 so I have a mobile HF rig. The only mobile HF antenna I have right now is for 6 and 10 meters. The nice thing about NMO antenna mounts is that they are easy to cap off and use later.
Below are some pics of the NMO installation.
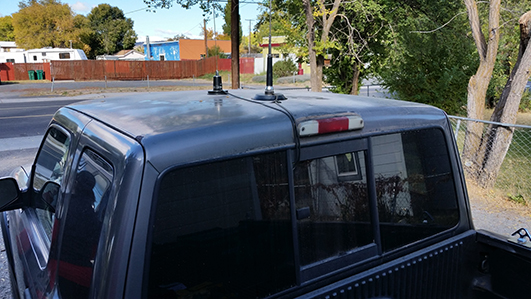
Having the mag mounts on the roof with feedlines crushed through the window gap is just ugly, not to mention it does horrible things to the feedline.
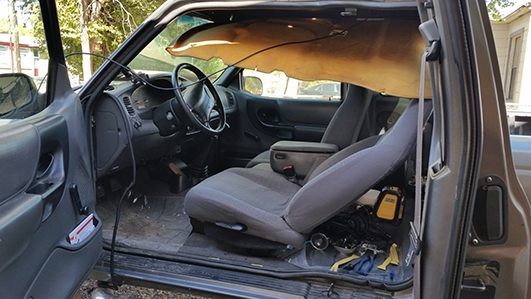
Construction always starts with a bit of demolition. In this case dropping the headliner. I only needed to pull down one side so that’s what I did. It required pulling the Shelf-It out and removing the door trim pieces around the entire door as well as one coat hook and the cab light.
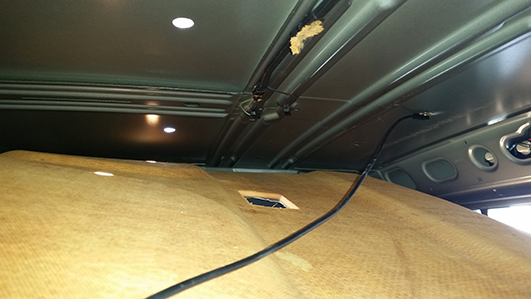
Here I have the back mount installed already and you can see the two 3/4″ holes for the other two.
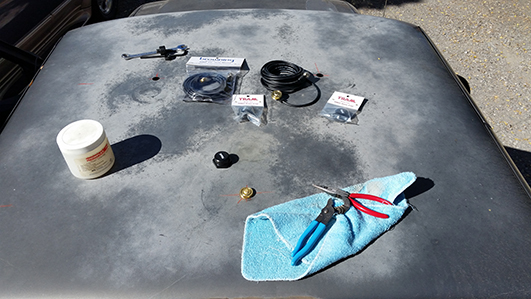
It looks like quite the mess, but it’s really pretty simple. The white jar on the left is Chemplex silicone grease to coat the weather seals on the connectors and antennas or caps. Clockwise, the punch tool with a box open-end wrench and Allen wrench cuts the holes, in the large bag is a mount with cable just like the one just to its right. The small bags and black cap in the center are covers for the mounts when no antenna is attached. On the rag are needle-nose and slip-joint pliers to tighten the mount down. The brass disk is the installed NMO mount.
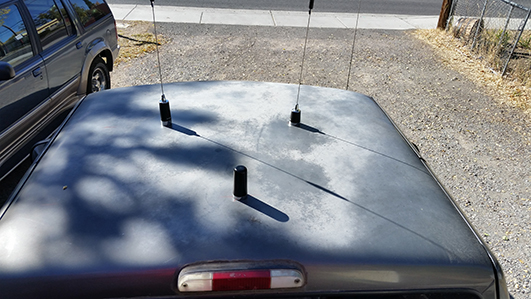
Three antennas installed. The front left is the dual-band ham antenna. The one on the right is for GMRS. The stubby one in the center is also a dual-band ham antenna I wanted to check out, a little performance comparison. The NMO mounts are much cleaner than the old mag mounts. I can still use the CB or any other radio that I can get an antenna with an NMO base. My CB antenna does. The advantage is I can move antennas or radios easily.
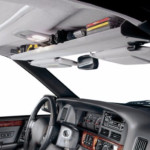
 My apologies for the blurry picture, the camera kept focusing on the near headliner. The radio on the left is the QYT KT-8900D and the one on the right is the Midland MXT400 GMRS. The mics and cords stow on the shelf and there is plenty of room for more radios. I used the holes in the headliner from the visor clips for cables coming out, power on the left just behind the GMRS radio and antenna cables just to the left of the center hump.
Things Upcoming… too much to go into, how about some keywords.
Pi TNCs plural, radio go box, more homebrew antennas, homebrew filter cavities for a repeater, much more digital mode…
Until next time, 73,
~Jon KK6GXG